Ever found yourself desperately needing obsidian for a nether portal, an enchantment table, or perhaps some shiny ender chests, but dreading the dangerous trek into the depths or the slow mining process? What if you could conjure this resilient block right at your base, safely and repeatedly, with just a few basic materials? That's exactly what simple obsidian generator designs offer—a game-changer for early and mid-game Minecraft players looking for an efficient, repeatable source without delving into complex redstone contraptions.
These ingenious setups turn the natural interaction of water and lava into a reliable obsidian farm. No more risky mining expeditions or hoping to stumble upon a rare ruined portal. You're about to become your own obsidian mogul.
At a Glance: Why Build a Simple Obsidian Generator?
- Easy to Build: Requires minimal resources and no complex redstone.
- Safe & Repeatable: Generate obsidian at your base, away from hostile mobs and lava falls.
- Early Game Essential: Get your Nether portal, enchantment table, and storage needs met quickly.
- Works in All Versions: These fundamental designs leverage core game mechanics.
- Highly Flexible: Scale your generator up or down to meet your exact needs.
The Obsidian Imperative: Why We Need This Resilient Block
Obsidian isn't just a pretty purple block; it's a cornerstone of progress in Minecraft. Without it, you can't access the Nether—the source of blaze rods, nether quartz, and potent brewing ingredients. It's the sturdy backbone of an enchantment table, letting you imbue your tools and armor with powerful abilities. And for advanced players, it's key for crafting ender chests, beacons, and even protecting your valuables from explosions.
Traditionally, obtaining obsidian means mining it in the Nether (which is dangerous) or finding natural lava pools and painstakingly adding water (which is slow and often one-time). Simple generators bypass these hurdles, giving you a steady, manageable supply. They're all about empowering you to progress without unnecessary risk or grind.
Unpacking the Magic: How Lava and Water Make Obsidian
At its heart, any obsidian generator relies on a fundamental Minecraft mechanic: when a water source block or flowing water touches a lava source block, that lava source block transforms into obsidian. This is crucial: if water touches flowing lava, you'll get cobblestone. The trick is making sure the water flows into the lava's source block.
This seemingly simple interaction is the foundation of all obsidian generators, from the most basic to the most elaborate automated farms. Understanding this core principle is the first step to mastering your own obsidian production line.
Your Essential Toolkit for Obsidian Generation
Before we start digging, let's gather what you'll need. The beauty of these simple designs is their modest material requirements. You likely have most of this already!
- At Least 1 Water Bucket: This is your primary activator. For larger generators, you might want more water buckets to quickly place water sources. Remember, water in Minecraft is infinitely renewable from a 2x2 trench.
- At Least 1 Lava Bucket: This is your raw material. You'll need one lava bucket for each obsidian block you intend to generate in a single cycle. Lava is also renewable, albeit slower, by digging a 1x1x1 pit and waiting for lava to naturally refill.
- Approximately 50 Fireproof Blocks: This is your construction material. Think cobblestone, stone, bricks, netherrack, or even obsidian itself. Avoid wood or anything flammable! The exact number depends on the size and complexity of your design, but having a decent stack on hand is wise.
- A Pickaxe: Naturally, to mine your freshly generated obsidian. A diamond pickaxe (or netherite) is ideal for speed; iron works but is much slower.
- Flat Land (Optional, but Recommended): A relatively flat area makes construction much easier, though these generators can be built almost anywhere.
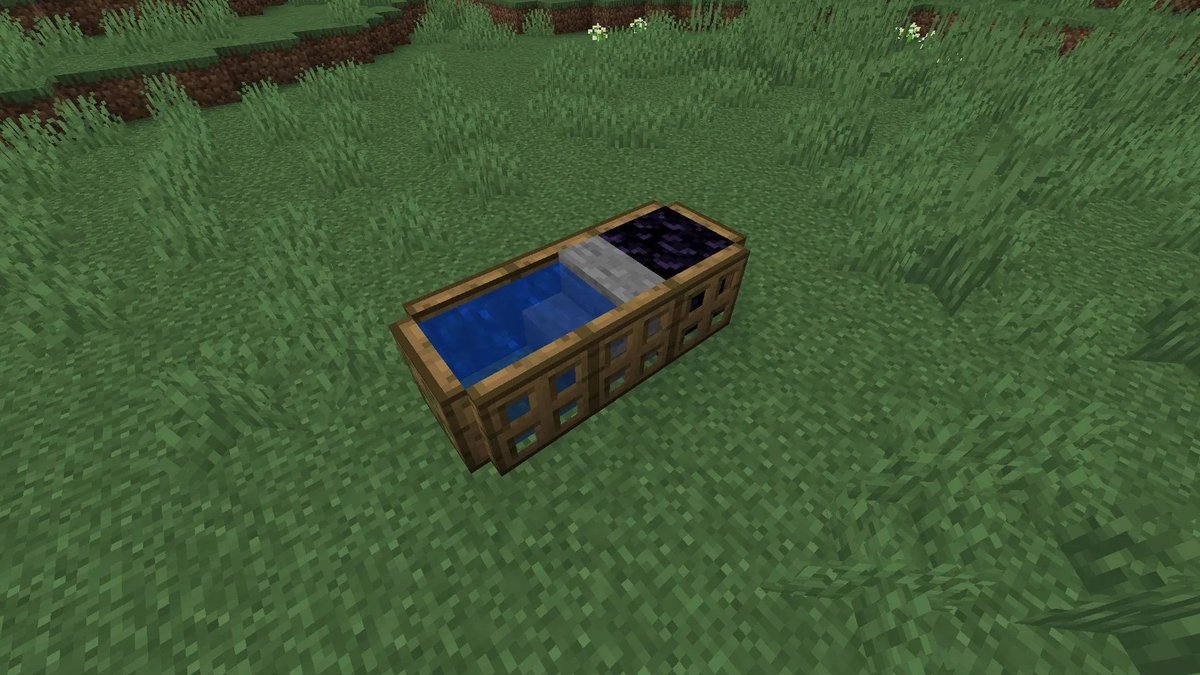
Design 1: The Classic Single-Block Dripper
This is the bread and butter of simple obsidian generators, directly inspired by early community designs. It’s reusable, easy to understand, and incredibly effective for getting started.
The Core Concept
Imagine two trenches side-by-side, separated by a single row of blocks. One trench holds water, the other holds lava. The key is that the lava trench is deeper and slightly lower than the water trench, allowing the water to flow down and into the lava source block.
Step-by-Step Construction Guide
- Level the Ground: Find a flat area, or flatten a small 5x3 (or larger) space.
- Build the Water Holder:
- Create a simple trench that is one block deep. For a single obsidian block, a 3-block long trench (1x3x1) will suffice, with solid blocks at each end.
- Place a water source block at one end of this trench. The water should flow freely to the other end.
- Build the Lava Holder:
- Next to your water trench, leave a single row of solid blocks as a separator.
- Dig a new trench for the lava. This trench needs to be two blocks deep.
- Crucially, this lava trench must be one block lower than the bottom of your water trench. Think of it as a step down.
- So, if your water trench floor is at Y-level 64, your lava trench floor should be at Y-level 62, and its top edge at Y-level 63.
- The lava holder needs to be long enough to accommodate your desired obsidian output. For a single obsidian, a 1x1x2 pit (two blocks deep) is enough to hold one lava bucket.
- On the side where the water will flow over, you’ll need a "step" block at the same level as the water trench floor. This allows the water to run over it and down into the lava.
- Visual Aid:
[Water Source] [Flowing Water] [Block]
[Block] [Block] [Divider Block] <-- This is the block you'll break
[Step Block] [Lava Source] [Lava Below]
- Place the Lava:
- In the two-block deep lava holder, place one bucket of lava into the bottom layer. This ensures it's a source block.
- Important: You need one lava bucket per desired obsidian block. For a single obsidian, one bucket in the 1x1x2 pit is perfect.
- The Trigger Block: Identify the single block separating the flowing water from the "step" that leads down to the lava. This is your trigger.
- Usage:
- Break the trigger block.
- The water will flow from its trench, over the "step," and down into the lava source block.
- Voila! The lava transforms into obsidian.
- Mine the obsidian.
- To reset, replace the trigger block, then place new lava in the lava holder. You can then repeat the process.
This design, often found on sites like Instructables, is a true workhorse. It's the foundation for understanding how water and lava interaction can be harnessed repeatedly for easy obsidian production.
Design 2: Scaling Up – The Multi-Block Simple Generator
Why stop at one obsidian block when you can make several? The multi-block generator is simply an extension of the classic dripper, allowing you to generate more obsidian in a single go.
The Concept of Expansion
The principle remains the same: water flowing over lava source blocks. The key here is to expand the lava holder laterally, ensuring each potential obsidian spot has its own lava source and direct water access.
Building a Production Line
- Extend Your Water Trench:
- Instead of a 1x3 water trench, make it longer. For example, a 1x5 or 1x7 trench, ensuring the water source at one end flows across the entire length.
- The water trench remains one block deep.
- Extend Your Lava Holder:
- Parallel to your extended water trench, maintain the one-block wide divider.
- Dig your lava trench, still two blocks deep and one block lower than the water trench floor.
- Match the length of your water trench. So, if water is 1x5, your lava holder would be 1x5x2 (5 blocks long, 1 block wide, 2 blocks deep).
- Create Multiple "Steps": Along the length of the lava holder, ensure you have "step" blocks at the same level as the water trench floor, allowing water to cascade into the lava below.
- Place Multiple Lava Sources:
- This is critical for multi-block generation. For every block of obsidian you want to generate, you must place a separate lava source bucket.
- If you have a 1x5 lava holder, you would place 5 lava buckets into the bottom layer of the trench, creating 5 individual lava source blocks.
- Common Pitfall: Don't just pour one bucket and expect it to spread and make multiple obsidian blocks. That will just create flowing lava, resulting in cobblestone. Each obsidian requires its own lava source.
- Trigger Row: The entire row of blocks separating the extended water flow from the extended lava "steps" becomes your trigger.
- Usage:
- Break the entire row of trigger blocks.
- Water will flow across, hitting each lava source block simultaneously (or near simultaneously).
- Mine your bounty of obsidian!
- Reset by replacing the trigger blocks and refilling the lava source blocks.
This scaled-up design is fantastic for quickly stocking up on obsidian. A 5-block long generator can yield 5 obsidian blocks in moments, making it much more efficient than its single-block predecessor when you need larger quantities. If you find yourself frequently using your Minecraft obsidian generator guide for other purposes, you'll quickly appreciate the speed of a multi-block design.
Troubleshooting Common Obsidian Generator Glitches
Even the simplest designs can sometimes be finicky. Here are some common issues and how to fix them:
- "I'm getting cobblestone, not obsidian!"
- The Fix: This almost always means the water is flowing onto flowing lava, not a lava source block. Double-check your lava holder's depth. The lava needs to be a source block at the very bottom, and the water needs to interact directly with that source block. Ensure the water is flowing down into the lava, not just skimming across the top of a lava stream.
- Height Difference: Re-verify that your lava trench floor is exactly two blocks lower than the water source, and the "step" block is positioned correctly.
- "The water isn't flowing into the lava."
- The Fix: Your water source might be too far, or there's an obstruction. Ensure the water source block is placed correctly in its trench and flows freely towards the separator blocks. Also, confirm the "step" block that allows water to cascade down is present and correctly positioned.
- "My blocks are burning!"
- The Fix: You're using flammable blocks for construction. Wood, wool, leaves, etc., will catch fire when exposed to lava. Always use fireproof materials like cobblestone, stone, bricks, or even dirt for your generator's structure.
- "My lava is spreading everywhere!"
- The Fix: This indicates your lava holder isn't properly contained. Ensure the walls of your lava trench are sufficiently high (at least two blocks above the lava source) to prevent spillage. Always place lava carefully, one bucket at a time, into its designated spot.
- "I placed multiple lava buckets but only got one obsidian."
- The Fix: You likely didn't have enough independent lava source blocks. Each obsidian generated requires a distinct lava source. If you're building a multi-block generator, make sure you pour a new bucket of lava for each desired obsidian block into its designated space in the deeper trench.
Beyond the Basics: When to Consider an Upgrade
Simple obsidian generators are fantastic for getting started and for players who don't need hundreds of blocks at once. They teach you the fundamental mechanics of obsidian creation without the headache of redstone.
However, if you find yourself needing massive quantities of obsidian—say, for building a colossal Wither cage, constructing an extensive nether hub, or embarking on ambitious mega-projects—you might eventually want to explore more advanced designs. These often involve:
- Automatic Lava Dispensing: Using dispensers with lava buckets activated by redstone to constantly supply lava.
- Water Control Systems: Pistons or more elaborate redstone to control water flow for fully automated generation.
- Obsidian Mining Machines: Contraptions that automatically mine the obsidian for you.
These advanced setups can be incredibly efficient, turning the entire process into a hands-off operation. But they come with a steeper learning curve and require significantly more resources and redstone knowledge. For most players, especially in early and mid-game, a simple, manually reset generator is more than sufficient.
Your Personal Obsidian Supply Chain, Simplified
Building a simple obsidian generator isn't just about getting a crucial block; it's about gaining independence in Minecraft. No longer are you beholden to random lava pools or dangerous Nether expeditions. You've harnessed one of the game's core mechanics to create a safe, reliable, and repeatable source of obsidian, right in the comfort of your own base.
Whether you're crafting your first Nether portal, enchanting your diamond pickaxe, or securing your valuable loot, these straightforward designs put the power of obsidian production firmly in your hands. Start with the single-block dripper, get comfortable with the mechanics, and then scale up to a multi-block production line when your ambition—or your construction plans���demand it. Happy building, and may your obsidian reserves always be plentiful!